
Party glow up is part of the Amazon affiliate program, which means if you make a purchase using one of our affiliate links we may make a small commission at no extra cost to you. Although the commission is tiny it all goes to help run Party Glow up so I can keep finding you the best top-rated party decor
Seriously easy balloon garland tutorial
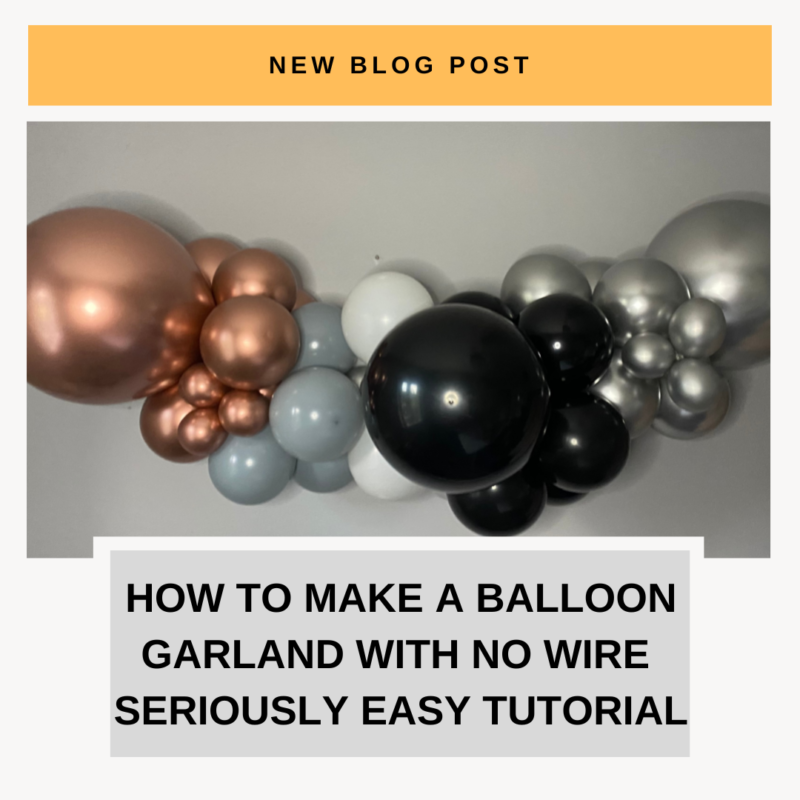
Hey, thanks for stopping by in this post I will show you how to make a simple wall-hung diy balloon garland using nothing but a bunch of balloons, a balloon inflator, and your hands. That’s right absolutely nothing else apart from a few hours of your time and something to hang it with.
This simple diy project to make a diy balloon arch is a really fun way to make a big impact at your next party, baby shower, outdoor event, or birthday party. If this is your first time making a balloon arch, you have come to the right blog post, here you will learn the easiest way that’s also going to give you a gorgeous party garland. Result!
If you have been researching how to make a fancy balloon arch, you will have probably come across a few different methods which involve everything from chicken wire, balloon strip, and string, I have also even seen needles being used too, no way would I want a needle anywhere near my balloons.
Whatever way you have seen or probably even tried the good news, there is a much easier way.
What do I need to make a balloon arch without wire?
First things first you need some good quality balloons, not just any balloon kits you need high-quality ones, here at Party Glow up I make that easy, any balloon kits that I recommend on my site are vetted by me to make sure they are the very best kits available. I have created this handy infographic that explains how many balloons you need to create the look you’re trying to achieve.
This is important because you need to know that the kit you are purchasing has the correct number of balloons or if you need to buy more kits.
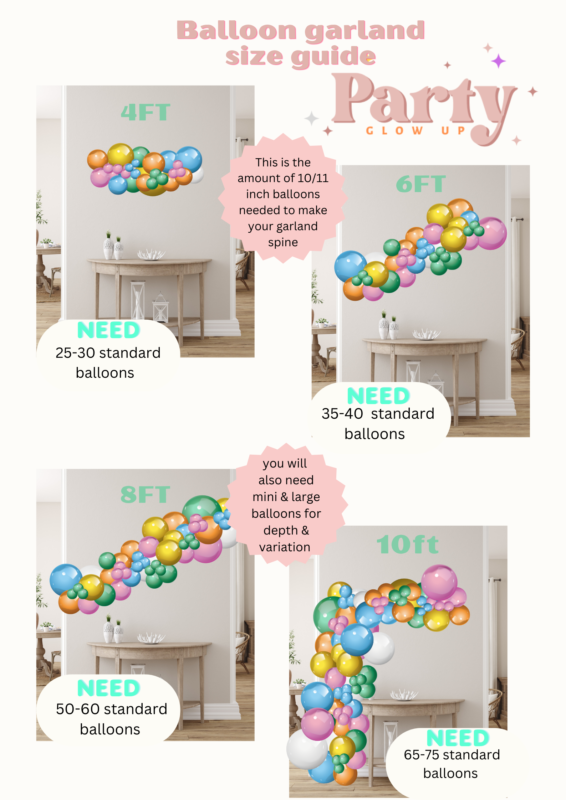
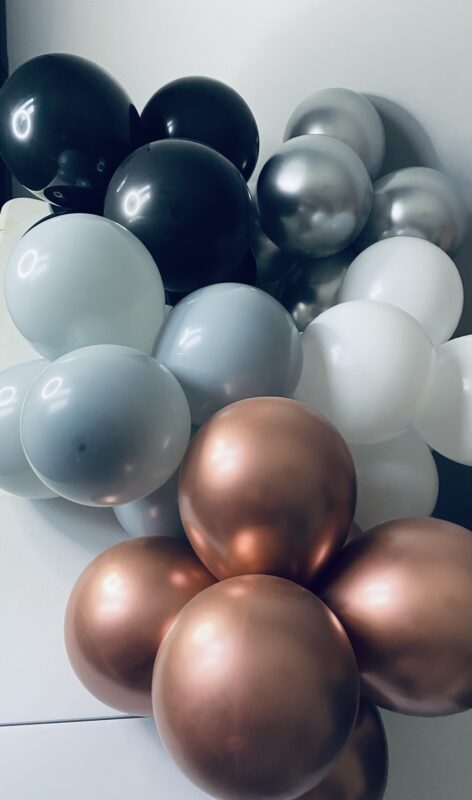
A good balloon garland needs to have different sizes of balloons to really add depth and variation. our featured kits have just that with larger balloons 18 or 24inch, standard sizes 10 or 11-inch and 5-inch minis.
Professional balloon artists mainly use double stuffed balloons, this is one balloon inserted into another balloon prior to inflating. This gives you custom colors and a thick full balloon that prolongs the balloon’s life. Lots of our kits come with double-stuffed balloons but a pro tip to consider if you’re wanting a really professional look is to buy two kits and double-stuff them yourself, which is really easy to do with a straw or pen end.
You can find the garland kits I recommend over in the SHOP.
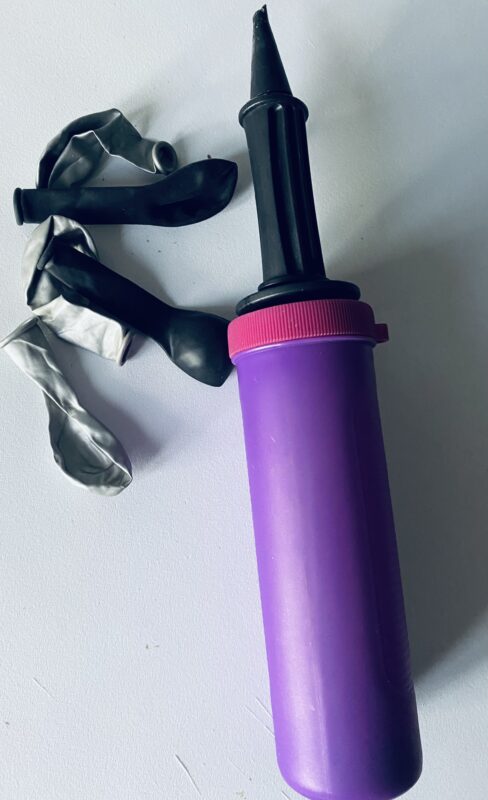
The best advice I can give you is to invest in an electric balloon pump and a handheld pump, these really are key to effortlessly making garlands, you can buy them together for under $20. Blowing up the number of balloons needed would not be an enjoyable task by mouth, can you just imagine and nearly impossible to inflate 5inch balloons? The electric pump and the handheld pumps I recommend can be found in our SHOP
Balloon garlands AKA balloon arches are made using air-filled balloons, no helium is needed to create these.

Electric Pump
pro’s
- Blows up balloons effortlessly
- makes the task a lot quicker
- can blow up really big balloons 24 inches and 36 inch
Con’s
- struggles to blow up some double stuffed balloons, sometimes a few blasts of air from the hand pump works a treat before blowing up on the electric pump.
- Mini balloons especially double stuffed are hard to blow up with the electric pump.
Handheld balloon pump
Pro’s
- Blows up double-stuffed balloons well
- Easily blows up mini balloons
- Cheap to buy
Con’s
- Hard work to blow up many balloons, and your arm will be aching.
- Can break easily if using them for a big garland

I think having both options is the best way forward and worth the investment because let’s face it why stop at one garland, once you have mastered a good technique you will be hooked, and you will be creating these for every special event you have in the future.
How to make a balloon arch without wire
So, let’s get to it once you have picked how you want your garland to look, and your color scheme, and ordered your balloon garland kit. It’s time to start creating, I think the best time to do your garland is anytime the day before the event, you want to enjoy the day of the event as much as possible. I have done a blog post on this subject which you can find Here I recommend reading that first as there are some good tips on how to keep your garland looking its best.
I don’t recommend using the balloon tape that is included in your balloon arch kit, the reason for this is it won’t give you a professional look. We want to be able to create these with the least number of items, I also don’t recommend using glue dots, low temperature glue gun, clear fishing line, floral wire, or a long piece of string.
I will now break the process down into easy steps.
Balloon garland tutorial
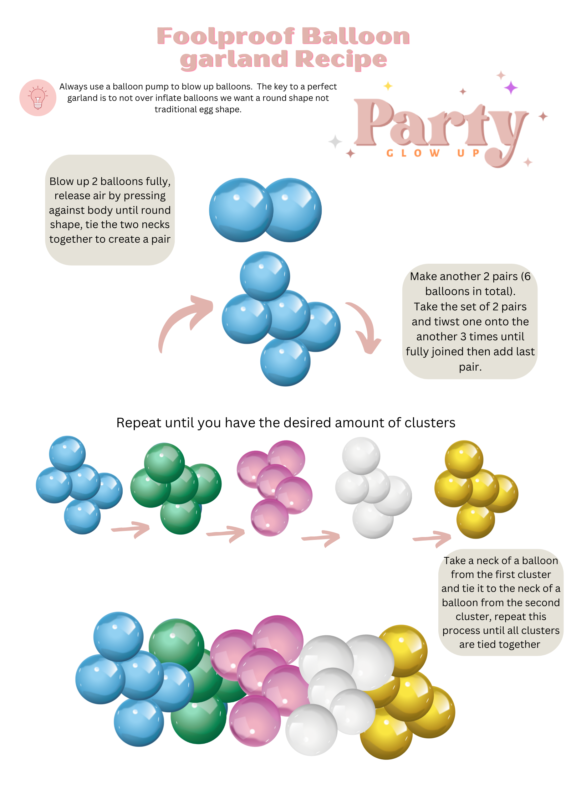
Below is a printable foolproof garland recipe infographic that you can print and keep at home to refer to as needed. Also, I have documented this method using photographs.
First step – Prepping
You want to open the balloon garland kit and sort it into different sizes of balloons. Separate your smaller balloons 5 inch into a pile, your larger balloons 18 inch, and your standard size balloons 10/11 inch. also separate any accent balloons like confetti, foil etc. Decide if you want to mix the different colors or have blocks of color, professional balloon artists tend to have blocks of color.
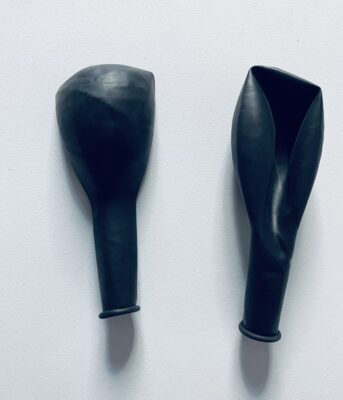
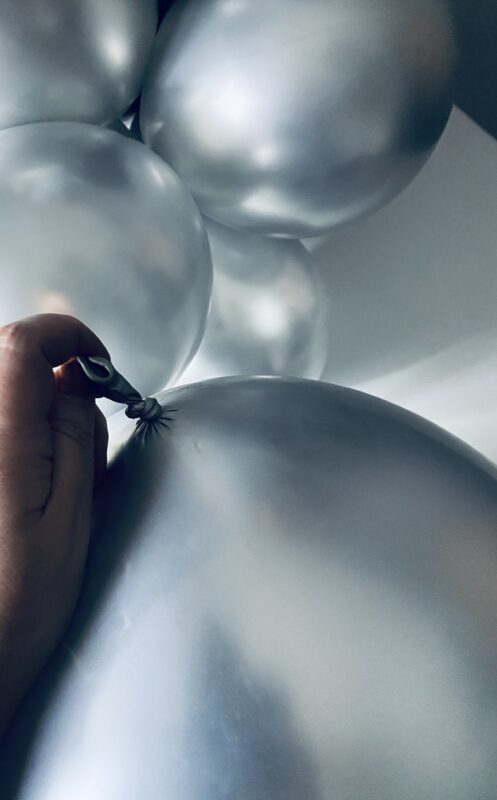
Take 2 10 inch balloons and blow up your first balloon until quite big, then holding the neck start pushing the balloon onto something hard either your body, wall or table, we want to slowly start releasing the air out of it until we have the balloon in a nice round shape, we do not want to over-inflate the balloons and they look pear-shaped. This is a very important step as how you blow up the balloons will determine the look of your garland.d
Tie a knot in the balloon and do the same process with another, take the knot of the balloon and the balloon knot of another balloon and tie these together by the neck and you now have a pair.
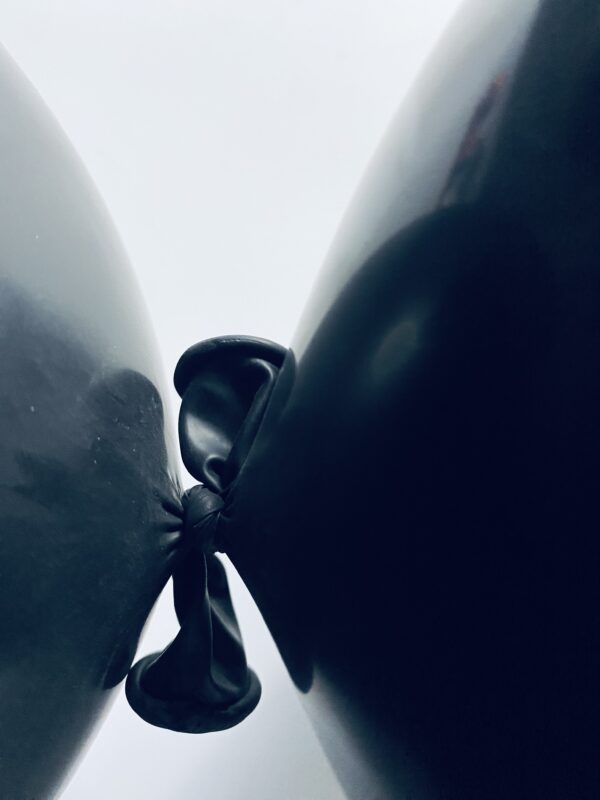
Repeat this process until you have 3 pairs (6) balloons in total.
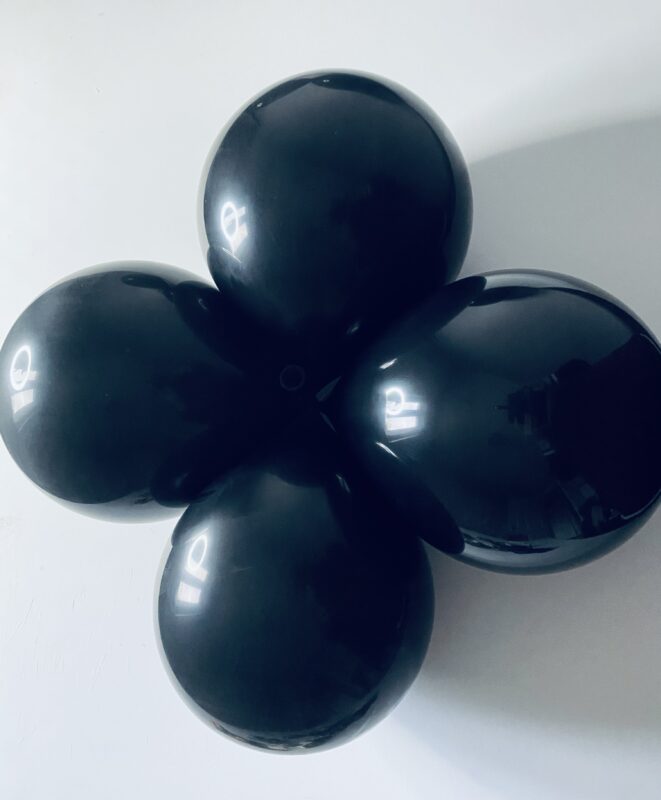
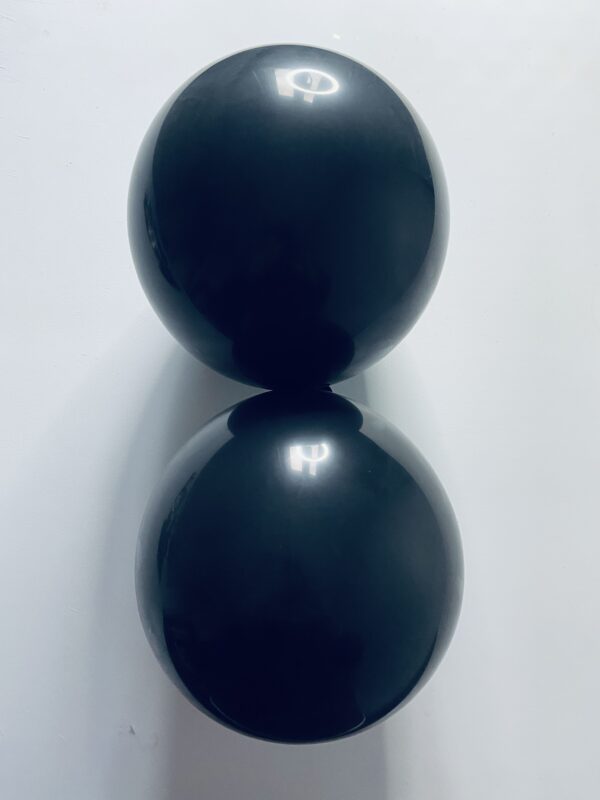
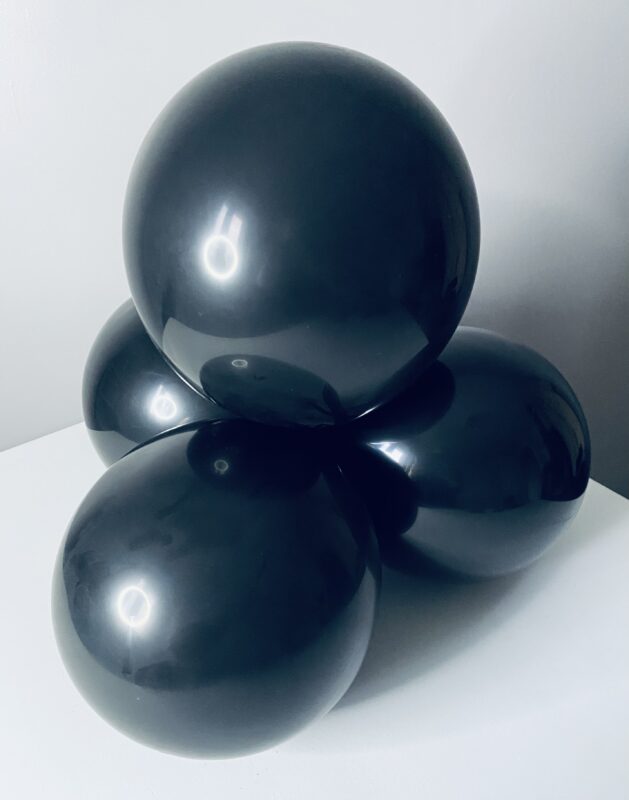
Once you have your 3 pairs, take 2 pairs and lie them on top of each other and start to twist them together twist about 3 times so they are joined.
Then add the last pair and join them. You now have a balloon cluster (6 balloons in total). well done.
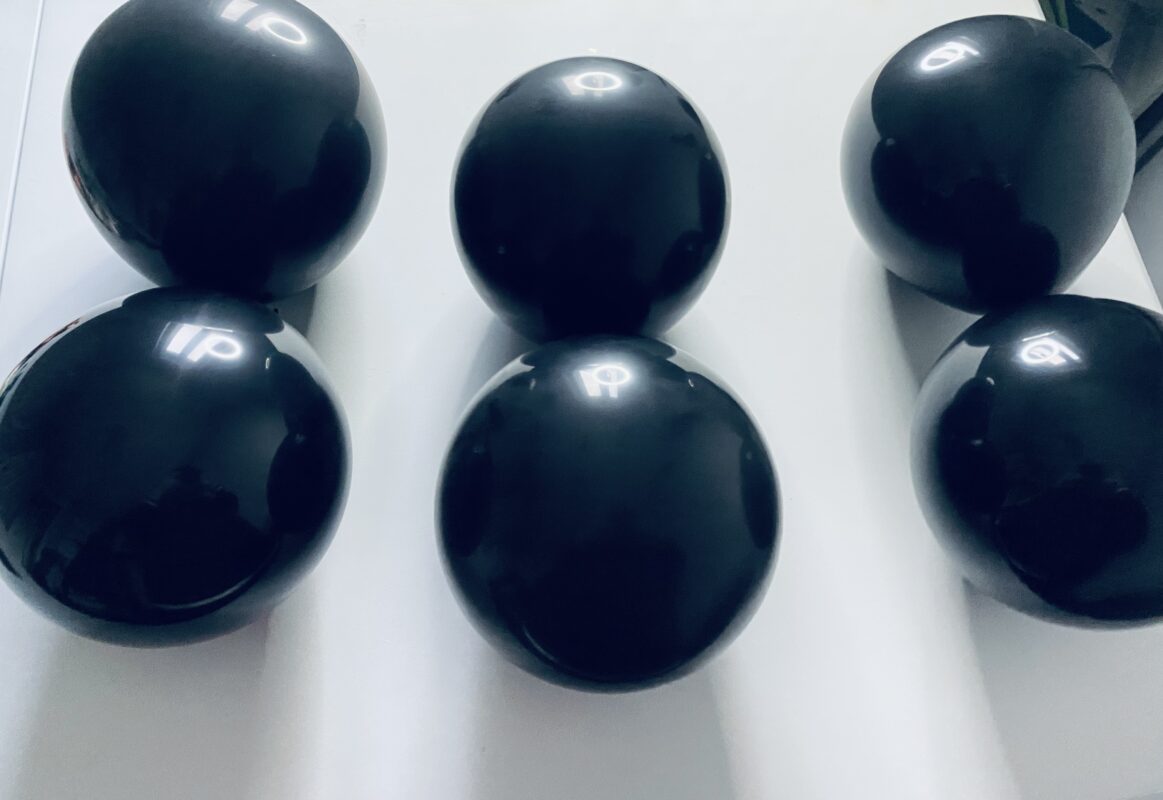
Keep creating clusters until you have the desired amount for the size of garland you are making.
Second Step – Backbone of garland
Now you have all your clusters you will now start to make the main part of your garland the backbone.
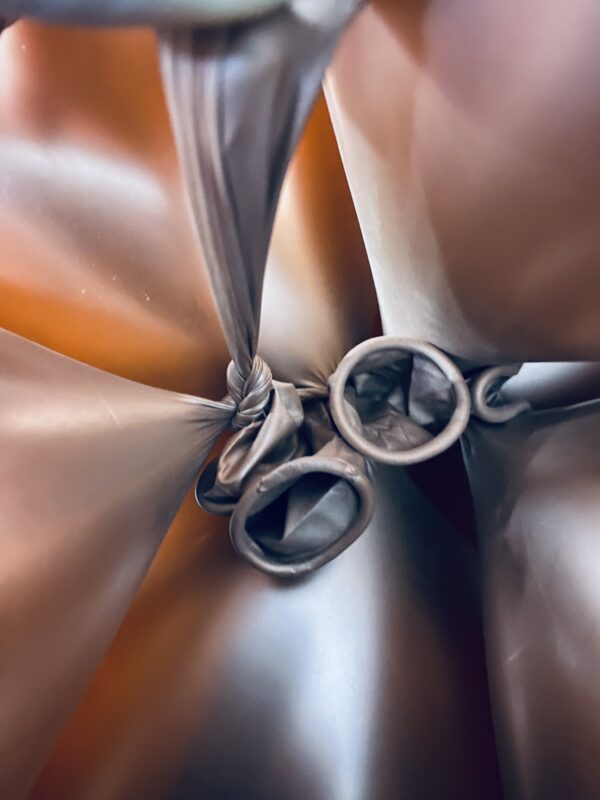
To do this you will take the neck of a balloon in a cluster and tie it to the neck of a balloon out of the second cluster, you will keep doing this until all the clusters are tied to together.
Your garland will look like this once all the clusters are tied together,
.
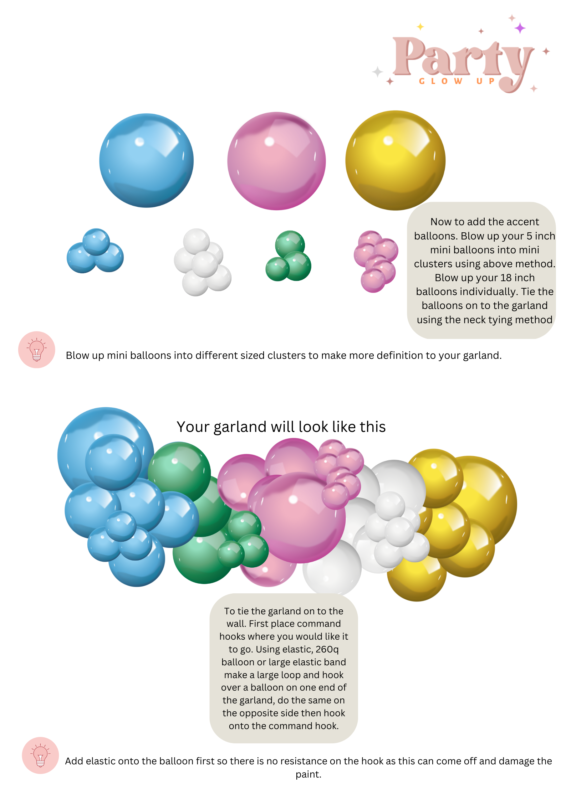
Third step – Accent balloons
Once you have your garland backbone made to its desired shape and size, it’s now time to add in your larger 18-inch size balloon, you will blow these up on their own separately and add them to the garland, this is the best part for me, adding accent balloons is the perfect way to really transform the look of the garland and they make a huge impact. by adding depth and variation and breaking up the standard sizes.
To add the 18-inch balloons, blow up each one individually using an electric air pump. Decide where you would like them to go on your garland, they look best spaced out, I used 3 on mine, one in the center and one on either end.
Once you have decided where to place them, choose a neck of a balloon from a cluster on your garland and tie the neck of the 18-inch balloon onto it, you might need to have a little mess with the balloon until you are happy with how it’s sitting on the garland.
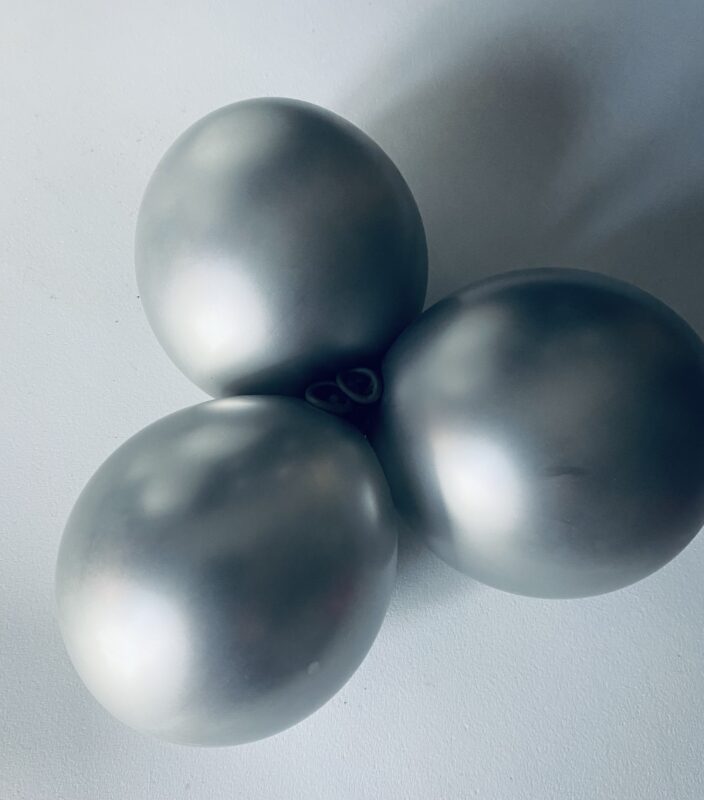
Now time to add your mini balloons, create a cluster of mini balloons exactly the same way that you did the clusters for the garland using your handheld pump to inflate and make sure they are nice and round and not over-inflated.
You can add as many mini balloons or as few as you want, I like to use three minis tied together or you can create bigger clusters to give more definition to your garland.
Then decide where you would like them to go and choose a neck of a balloon from the garland and tie it to the neck of the mini balloons.
At this point, you can then add fresh flowers, artificial flowers, and greenery sprigs if that’s the end result you are going for.
Fourth step – attaching the garland
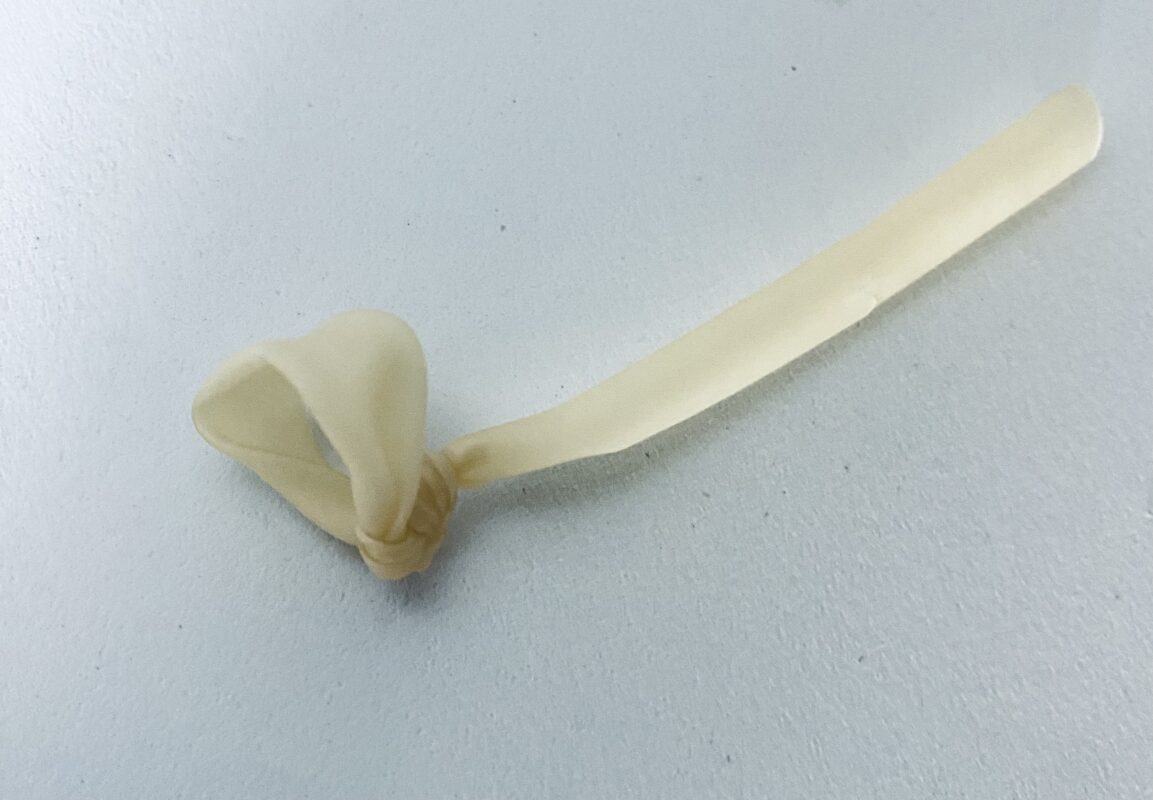
Now that your garland is made you will need to place it where you want it to go. Garlands are usually hung on the wall with command hooks and a 260q balloon, these are long stretchy modeling balloons, they are really great for attaching garlands to the wall.
This one I’ve tied a loop at one end, that will hook onto either a command hook or nail.
Chances are you won’t have these, don’t worry if you don’t but you will need something to hang the garland with, some string, elastic, ribbon or anything else you have lying about even some yarn would do the trick. Don’t worry what color as you won’t be able to see this once the garland is hung, cut a piece about 10 inches in length and tie it around a neck of a balloon on one end of the garland then create a hoop and re-tie,
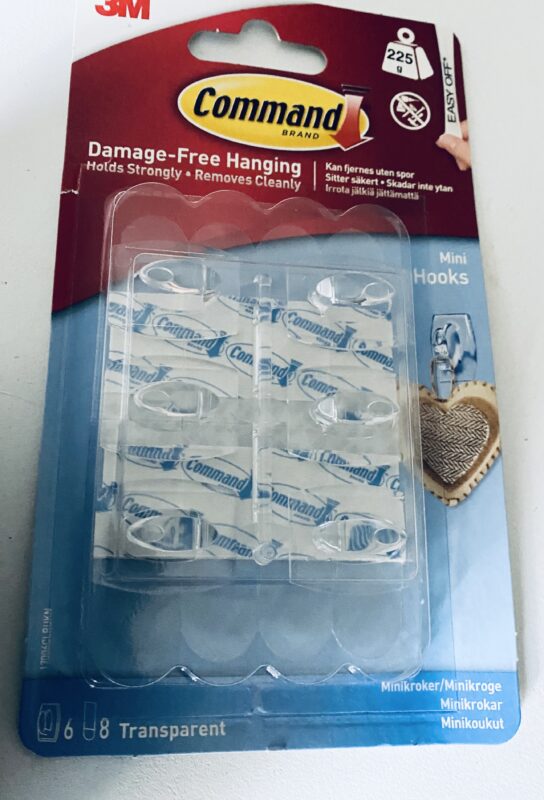
Hook this onto the command hook, nail or stick with masking tape onto the wall being careful not to damage paintwork when removing. Do the same on the opposite end of the garland.
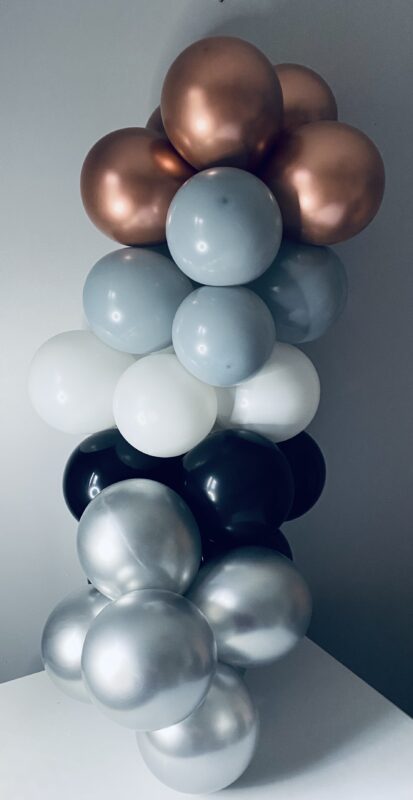
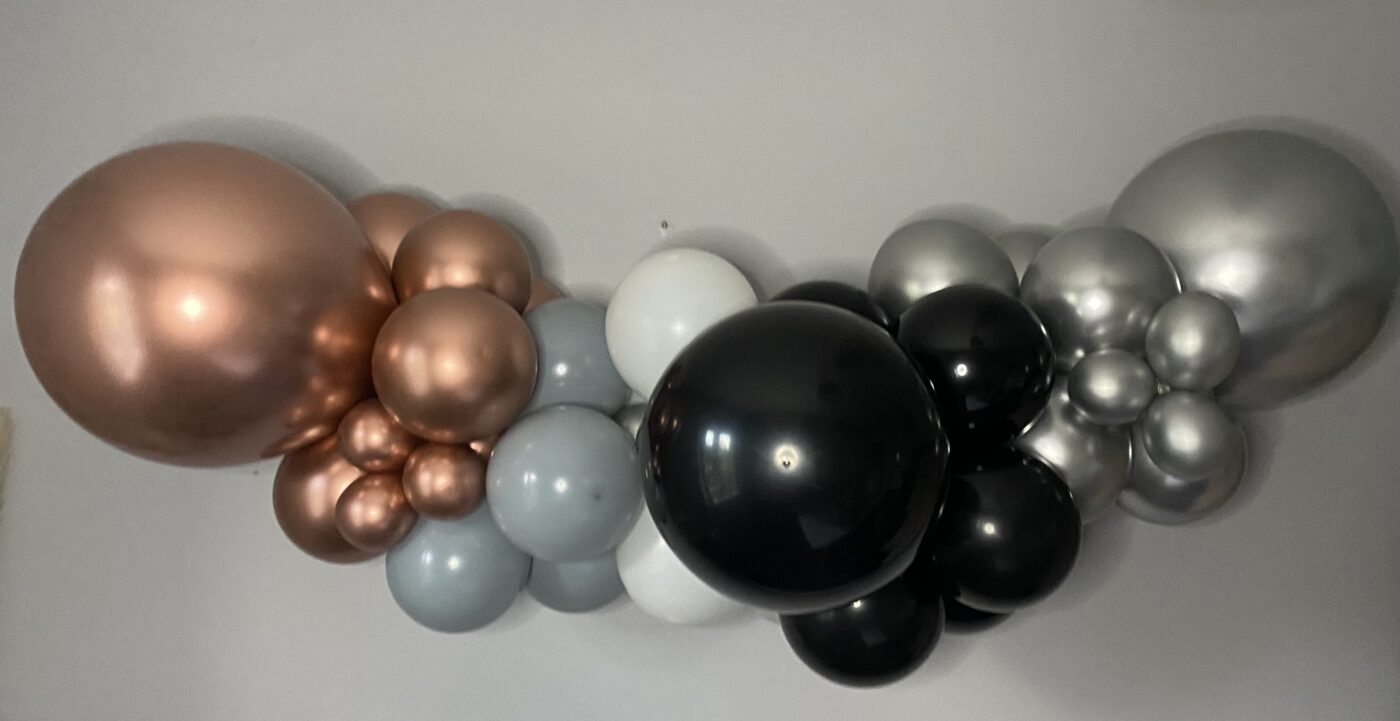
Finished balloon garland
“Thank you, Renee this tutorial was so easy to follow, I made my first ever garland for my daughter’s 5th birthday, I’m hooked.”
Jenny Tyler
mum to Jessica
Pinterest
Pingback: The best-rated DIY balloon garland kits online to do yourself at home - Party Glow Up